
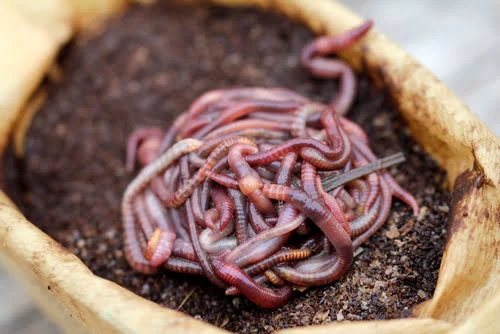
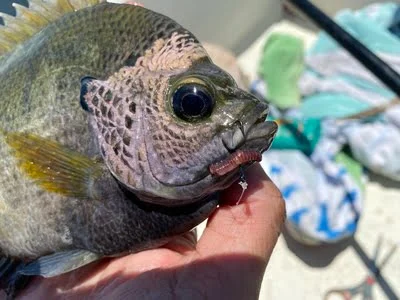
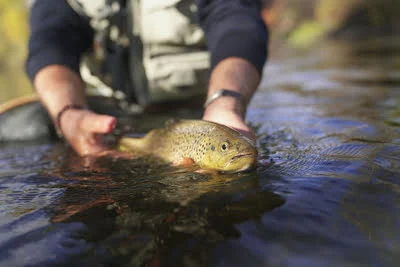
One of the best baits, for just about any type of freshwater fishing, is a live worm.
Just about every fish that swims will eat a worm!
But, the cost and time it takes to buy worms before every fishing trip, can be a hindrance. Luckily, you can easily raise your own worms for fishing!
Raising your own worms can save you time and money and provide a nearly unlimited supply of live bait at your fingertips.
Worms are very easy to raise and require minimal care and effort. Raising worms requires certain temperatures and frequent food to stay healthy and thrive.
Table of Contents
How To Grow Worms For Fishing
To raise worms, you will need the following:
- A Worm Container. A plastic bin or cooler works great, just make sure it has a lid. Something like a plastic storage bin around 25x16x13 inches is excellent and these can be purchased extremely cheap at Walmart.
- Peat Moss. Peat moss will provide the worms with some good soil to live in. You will only need a few cups of it, as you can supplement the entire container with natural soil from your area and shredded paper.
- Drill with a ¼-inch drill bit. This will be used to modify the worm container.
- A cool and controlled environment where you can maintain a temperature between 68 and 75 degrees Fahrenheit.
How to Raise Nightcrawlers
Nightcrawlers are one of the most popular types of worms that are used for fishing and are among the easiest to raise.
These worms will grow to around 6 inches in length and are more resistant to heat and cold than other types as well.
This makes them the preferred species to raise and fish with.
Step 1: Prepare the Container.
Take the drill and drill holes around four inches apart on the bottom of the plastic container and the lid. This allows for proper drainage and airflow. Find a good place for the container that is out of the sun.
A shady spot in your yard or garage can be a great place to put your worm container.
Just remember that these worms prefer temperatures from 55 to 78 degrees, although they can survive down to 40 degrees if needed.
Step 2: Prepare the Soil.
Start by placing a few cups of peat moss along the bottom of the container. Completely cover the bottom, but do not make it more than 4 or 5 inches deep. Add a few cups of water to ensure a moist surface.
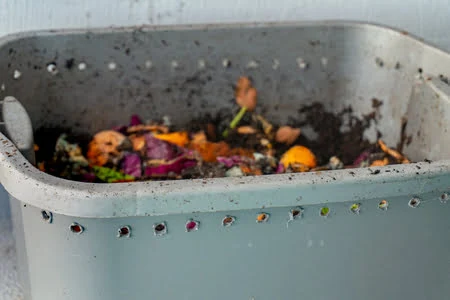
Next, add in about an inch of shredded paper. Add in some food scraps and egg shells to this layer, mixing well.
Finally, take some regular soil from your yard and cover this mixture. Do not add any more than an inch or two of this additional, regular soil.
Step 3: Add the Nightcrawlers.
Buy some nightcrawlers either online or from your local bait store. A container of this size can easily fit up to 100 worms or more. Simply place them on top of the soil and close the lid.
Step 4: Feed and Maintain the Worms.
Now all you have to do is be patient! The worms will bury themselves in the soil and should be thriving.
Once a week, be sure to feed the worms by evenly distributing the food across the surface of the soil.
Nightcrawlers love any type of vegetables, egg shells, and food scraps. Do not feed them meat, dairy, or citrus.
Check the temperature to ensure the worms are comfortable and keep the soil moist but not wet.
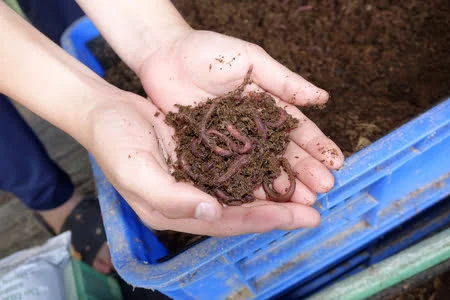
How to Raise Red Worms
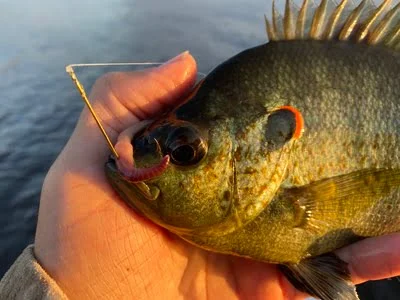
Red worms (also known as red wigglers) are raised almost exactly the same as nightcrawlers. These worms are a little smaller and are primarily used as bait for panfish.
They are known for being extremely lively when on a hook, using movement to attract the fish.
Red worms also live longer underwater than other types of worms. But, due to their smaller size, they can need some more time to fatten up and can be hard to attach to a hook when fishing.
Step 1. Find and Prepare a Home for the Worms.
Any large bucket or plastic container will work fine. You can even use foam or wooden containers, if you have to, just make sure it’s placed in some shade.
Our favorite is still the plastic bin.
Step 2: Mix the Soil.
Red worms are very hardy and mixing the soil is not an exact science. Simply mix one part peat moss, one part dirt, and one part manure. Since they are surface feeders, the amount and depth in your container are not an issue.
Step 3: Acquire Red Worms.
Buy some red worms from a local bait shop or order them online. Some of the best prices can be found online and even Amazon.com.
Or, you can jump-start your worm supply by catching your own worms right from your garden or yard!
Step 4: Maintenance and Upkeep.
Add vegetable scraps once a week to your worm container. One pound of red worms will eat around one pound of food daily, so feed them accordingly. Spray or mist the soil to keep it moist.
Red worms are also surface feeders and because they spend more time at the surface they can adapt to warmer temperatures than nightcrawlers.
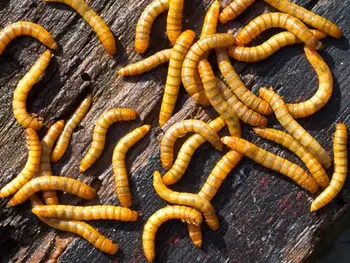
How to Raise Mealworms
Mealworms are very versatile bait that can be used for all kinds of fish (yellow perch love them!). They are, however, a lot more difficult to raise.
Mealworms take longer to reproduce, and you need to harvest them during the pupae stage. Aside from a few additional steps, they are raised very similarly to both nightcrawlers and red worms.
Step 1: Prepare the MealWorm Container.
Mealworms can be kept just about anywhere, including in plastic shoe containers, glass aquariums, or even in a simple bucket. Just ensure that it has a solid bottom to prevent them from escaping and a vented lid to allow for airflow.
In the bottom of your container, place a one-inch layer of oats or cornmeal down. This provides proper bedding and food for mealworms as they progress through their different stages of development.
Place in some chopped carrots or apples to provide a water source for the worms, and make sure to replace these often to avoid mold.
Step 2: Add Mealworms
After buying some mealworms, add them to their new home. It will take some time and patience before these mealworms start reproducing so be prepared to wait until your new mealworm farm starts to see some results.
Keep them in a dark, warm area. Garages work great for this. Unlike other types of worms, mealworms need heat and prefer temperatures around 70 to 85 degrees.
Step 3: Upkeep Your Colony
Periodically remove any old vegetables and replace them with fresh ones. Add more vegetables and oatmeal as needed. While doing this, keep an eye out for pupa in the mealworm container.
This transition from worm to pupa can take anywhere from a week to several months. Once they begin to develop into pupa, remove them, and place them in a separate container away from both larvae and adults.
Additional containers for all three stages of a mealworm’s life are needed if you intend to raise them long-term.
Once the meal worm pupa hatch (this can take anywhere from one to several weeks), you will have adult beetles that can reproduce and create more mealworms.
Once the adults hatch, take them out and place them in their own container. They can and will eat larvae and pupae so it is important to separate them.
Their container should contain the same oatmeal and vegetable environment as the larvae and pupa containers.
With all three containers housing different stages of your mealworms, you will have a reproducing colony that can start providing you with an endless supply of bait!
How to Raise Wax Worms
Wax worms can be expensive, so raising them yourself is a great way to cut costs.
They are raised in a very similar manner to mealworms and require the same basic materials.
And let’s not forget that they are one of the best worms to use for catching trout!
Step 1: Prep the Container
Any hard container made of plastic, glass, or metal will work. Just avoid wood, as the wax worms can eat right through it. This container can be any size, but one that is 5 gallons in size or bigger will work the best.
Using some 20 gauge or smaller wire, create a mesh screen for the lid.
For a base layer, place half of one box of mixed grain cereal mixed with a 1/3 cup of honey and 1/3 cup of glycerin.
Add in some water if the mixture is too thick to stir. Next, add some crumpled-up wax paper to the bottom to give the worms a place to lay eggs.
Step 2: Introduce Worms to Container
Wax worms can be bought from stores or online in special kits that contain 24 to 40 worms. Wax worm kits like that from waxwormkit.com are great if you do not have a local bait store that sells them.
After carefully placing all of the worms inside their container, securely place the mesh lid on top. Place the container in a warm, dark area. Wax worms can survive in just about any temperature but do best in places that are 70 to 80 degrees.
Step 3: Feed and Maintain Your Worms
Food is made using the same mixture as before, combining half a bag of mixed grain cereal, honey, and glycerin. As a general rule of thumb, add new food to the container once every two weeks.
Eventually, your wax worms will pupate and turn into moths. This is when they will lay eggs on the wax paper and eventually die. The entire process usually takes around two to three weeks.
With some care, you should have a never-ending supply of wax worms as your colony continues through the different life stages. Wax worms can also be collected and placed in a freezer for future fishing.
Most Common Types of Fishing Worms
There are many different types of worms that can be used as fish bait, but the most common types are mealworms, nightcrawlers, red worms, and wax worms.
While all of the different types of worms are similar and are raised in similar ways, there are a few key differences between every type of worm and how to properly raise them.
See Also: The Best Crappie Baits To Catch Slabs All Year Long
Frequently Asked Questions
How long does it take worms to reproduce?
The time it takes for worms to mature and reproduce will depend on the type of worm and the conditions it is living in. The average time, however, is around 27 days. Worms are able to completely double their population about every 60 days.
Is worm farming difficult?
Worm farms are incredibly easy to start and maintain. Worms take very little time and effort to take care of, and they do not take up a lot of room.
What are the easiest worms to raise?
Out of all of the popular types of fishing worms, red worms are most often considered the easiest to raise. Red worms are very hardy and can survive wide temperature ranges and conditions.
What are the best worms to raise for fishing?
The best type of worm to raise for fishing will depend on the type of fishing you do. Smaller worms like red worms tend to work best for panfish, while larger types like nightcrawlers do well for bass and catfish.
Can you save money by raising your own worms for bait?
One of the biggest benefits of raising your own worms is saving money at the bait shop. Producing your own worms can save an avid fisherman a lot of money over the season and provide a fun learning experience at the same time.
You May Also Like: The Complete Guide To Raising Minnows For Bait
If you haven’t guessed yet, I love fishing and everything about it!
To learn more about why I started Panfish Nation, visit the About page and follow along on Social Media:
Download a copy of my FREE Lure Color Selection Chart & Knot Guide!
Stay up to date with fishing reports, tackle reviews, industry news, and much more! We respect your privacy, unsubscribe at any time.